It was a lot of fun sharing our before & after pictures of our kitchen yesterday – it has truly come such a long way! This kitchen has been a big, long, labor of love. I hope you’re ready for an overload of pictures today!
Make sure you’re following me on Instagram so you can see all of the progress pictures (using #1902kitchen). You can also get caught up on all of our house renovations here.
Here’s all of the details about our DIY farmhouse kitchen makeover:
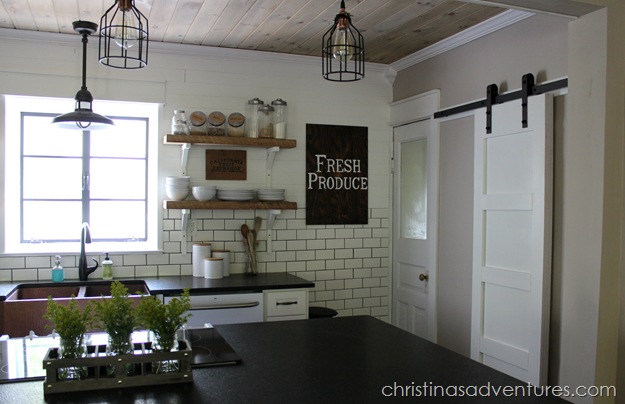
First of all – let’s talk about lighting. I knew we wanted to have an amazing light fixture above our sink, and I fell in love with this one from Barn Light Electric. The best thing is that it’s completely customizable, so I got to choose color, pendant size, glass type, etc. The end result = LOVE!
Refrigerator / Faucet
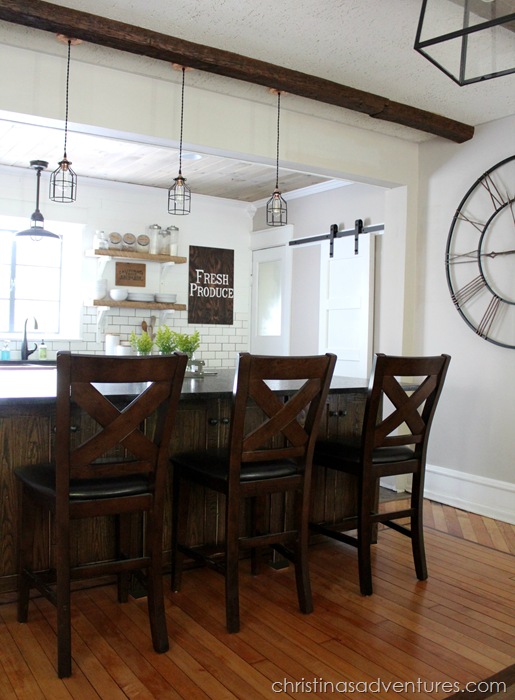
I also wanted some lighting above our BIG island, and wanted it to go along with our farmhouse style. These copper pendant lights were perfect – they complemented our copper sink and fit perfectly into our kitchen style:
The furniture in this kitchen truly represents my design style – a mix of new, vintage, and homemade items. I couldn’t be happier with how it all turned out! First of all, I’d love to brag about my husband for a minute. He MADE this table for us! Thanks to the lovely Shanty 2 Chic bloggers, he was able to follow their plans to make this stunning 8 foot farmhouse table:
I knew I wanted some beautiful seating to go around this table, and I had always wanted a big pew to be a part of my kitchen. It took MONTHS of searching every day, but I finally found one on Craigslist. It needed us to sturdy it up a little bit, and then I painted, distressed, and glazed it to give it the finish you see now.
We paired it with some beautiful chairs from Raymour & Flanigan – these nailhead upholstered chairs are perfect at the ends of our table, and they paired so nicely with the x-backed nailhead trim chairs on the long end of the table. Seriously – LOVE!
The appliances in this kitchen were something I deliberated a lot about. Everyone was trying to sell me stainless steel appliances, but I wasn’t sold. I love having a clean white look, but I truly loved retro-style refrigerators. Um – have you SEEN how expensive those can be? Crazy! Then I found the GE Artistry series, and I couldn’t get them out of my mind. I fell in love with the white/stainless combo, the retro design, and the fact that they’re well priced. Sold!
The GE Artistry line also has the most adorable range, but unfortunately we couldn’t use it in our kitchen because we did a slide-in range in our island. Thankfully, this range fits in really well with the other appliances and looks great in our island:
Our cabinets are another part of the kitchen that I couldn’t be more thrilled about. We used an Amish cabinet maker to make these, and they’re such great quality, and for a lot less money than we would have spent at a big box store. Plus, I just love the fact that we were able to support his business!
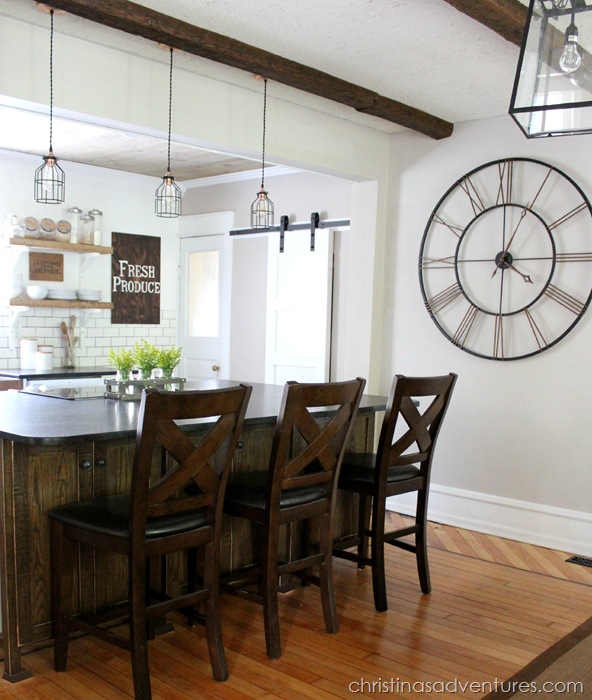
I chose white cabinetry up against the wall, but a rustic wood island in the middle. This island is full of valuable storage, which is so important in a kitchen without upper cabinets!
The island looks awesome with our Raymour & Flanigan counter stools – I love that the x-back on these mirrors the x-backs on the kitchen table chairs!
And can we talk about this clock for a minute? I didn’t realize how much I was going to love it until it was in our kitchen. This thing is about 4 feet in diameter – so it’s HUGE! But it truly makes our kitchen, and I love it SO much!
Finally – the controversial open shelving. We did this in our last kitchen remodel, and I truly loved it. I know it’s not for everyone, but I love it so much. We used the same IKEA brackets as we did before, but this time, we found a local shop that sells reclaimed barn wood. It was SUCH a great find, and I’m slightly obsessed with these rustic chunky wood shelves:
And just one more reminder of how far this space has come (make sure you check out all of the before & after pictures here!)
Here’s all of the details about everything else you see in our kitchen – please ask me in the comments if you’re looking for some more information, it’s very possible I would have missed something! I will be sharing DIY tutorials for projects over the next few months. Some of my favorites – our wooden planked ceiling and our barn door pantry!
-
Wall color: Martha Stewart Sharkey Gray (see my neutral paint color favorites here)
-
Wood ceiling: DIY
-
Sliding Pantry Door: DIY + sliding barn door hardware
-
Floors: Dining side – original to the house. Kitchen side – Adura Dockside luxury vinyl tile
-
Plank wall: DIY – using these planks & ultra white trim paint
-
Ceiling Beams: original to the house
-
Wood ceiling: DIY (see my wood ceiling inspiration here)
-
Fresh Produce Sign: DIY
-
Subway tile: White 3X6 subway tiles + charcoal gray grout
To say that we’re in love with our new kitchen would be an understatement. We are thrilled to have it DONE, and to enjoy it as a family for so many more years to come!
HUGE thanks to Raymour & Flanigan, GE Appliances & Barn Light Electric for providing me with products for our new kitchen. As always, all opinions are 100% my own. This post also contains some affiliate links. Full disclosure here.
Like this post? You’ll also like:
Our first home’s budget DIY kitchen remodel:
Inspiration for our farmhouse kitchen design:
Pin ItThe post DIY Farmhouse Kitchen Makeover: All the Details appeared first on Christinas Adventures.


